
9 DIY Home Repair Projects You Can Tackle with Confidence
Homeownership comes with plenty of perks, but one inevitable reality is that things will break, wear out, or need a little TLC. While calling in a professional is sometimes necessary, there are many repairs you can tackle yourself with just a bit of know-how and the right tools. Taking the DIY route not only saves money but also gives you a sense of accomplishment.
In this article, we’ll cover 9 DIY home repair projects that are manageable for most homeowners and can make a big impact on the comfort, safety, and beauty of your space.
1. Fixing a Leaky Faucet
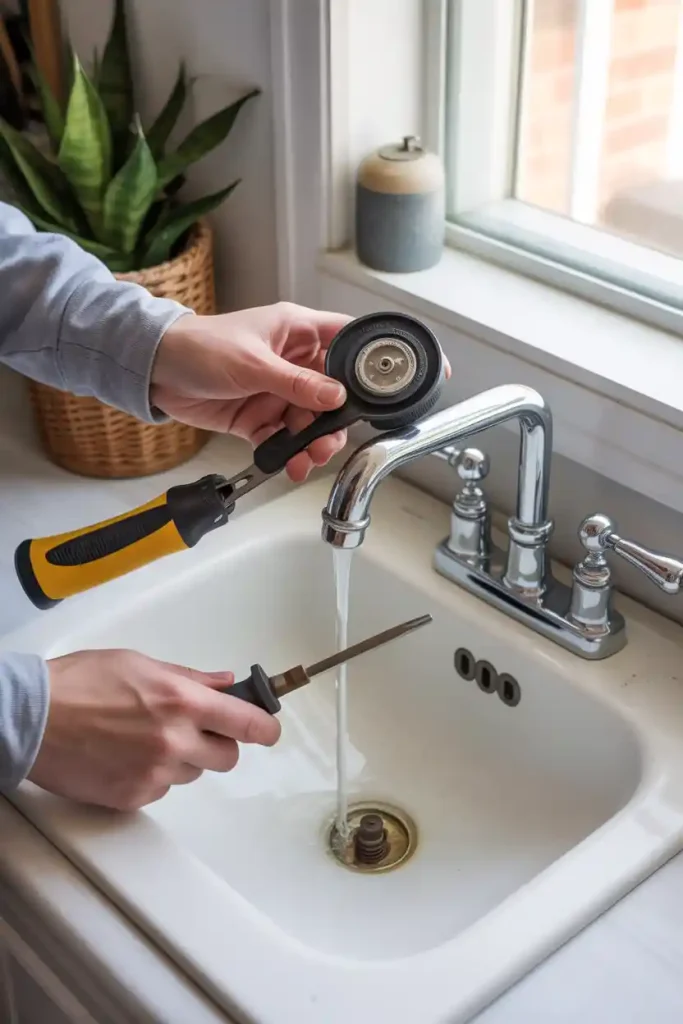
Few things are as annoying as a dripping faucet, and over time, that drip can waste gallons of water. The good news? Repairing it is often as simple as replacing a worn-out washer or O-ring.
- What you need: Adjustable wrench, replacement washer or cartridge, plumber’s tape.
- Steps: Turn off the water supply, disassemble the faucet handle, swap out the faulty part, and reassemble.
A quick repair not only saves water but also reduces your utility bills. For more tips on improving efficiency, check out this guide on energy-saving ideas for your home.
2. Repairing Drywall Holes

Accidents happen—furniture bumps the wall, or kids’ play gets a little too energetic. Small drywall holes are one of the easiest DIY fixes.
- Small holes (under ½ inch): Use spackle and a putty knife, then sand smooth once it dries.
- Medium holes (1–3 inches): Apply a patch kit, then spackle and paint over.
- Larger holes: You may need to cut out the damaged area, insert a new piece of drywall, and tape the seams.
Once repaired and painted, the wall will look as good as new. If you’re choosing fresh wall colors, this article on picking the right paint finishes can help.
3. Unclogging Drains Naturally

A slow or clogged drain doesn’t always require harsh chemicals. In many cases, you can solve the problem with simple household items.
- Method 1: Pour a mixture of baking soda and vinegar down the drain, followed by boiling water.
- Method 2: Use a plunger or a drain snake to dislodge blockages.
These eco-friendly solutions help maintain your pipes and avoid expensive plumber calls. If you’re looking to enhance your bathroom experience while keeping it functional, explore these bathroom design ideas.
4. Replacing a Broken Tile

Cracked or chipped tiles not only look unattractive but can also let moisture seep into your floors or walls. Replacing a tile may sound intimidating, but with a little patience, it’s completely doable.
- What you need: Hammer, chisel, tile adhesive, grout, and a matching replacement tile.
- Steps: Carefully remove the broken tile, clean the area, apply adhesive, set the new tile, and grout once dry.
This small repair helps preserve the integrity of your flooring. If you’re considering a full refresh, you’ll love these flooring upgrade tips.
5. Patching Up a Screen Door or Window

Torn window and door screens let in bugs and compromise airflow. Luckily, patching them is quick and inexpensive.
- Small tears: Use a screen patch kit.
- Large holes: Replace the entire screen mesh using a spline roller.
Fresh screens instantly improve the comfort of your indoor spaces. To complement this fix, consider adding more natural light—these window treatment ideas might inspire you.
6. Stopping a Running Toilet

A toilet that won’t stop running can waste hundreds of gallons of water monthly. In most cases, the culprit is a faulty flapper or fill valve.
- Steps: Open the tank lid, inspect the flapper for wear, and replace it if necessary. If the fill valve is the issue, swap it out with a new one.
This simple repair saves money and water. For more bathroom upgrades that blend function and style, check out modern bathroom décor trends.
7. Fixing a Sticking Door

Humidity, settling, or worn hinges can cause doors to stick. Instead of forcing the door shut every time, try these DIY fixes:
- Tighten or replace loose hinge screws.
- Sand down swollen areas of the door edge.
- Apply a bit of paraffin wax to reduce friction.
A smoothly operating door enhances daily comfort. While you’re at it, you might also enjoy exploring front door design ideas for a refreshed entryway.
8. Refreshing Old Caulk
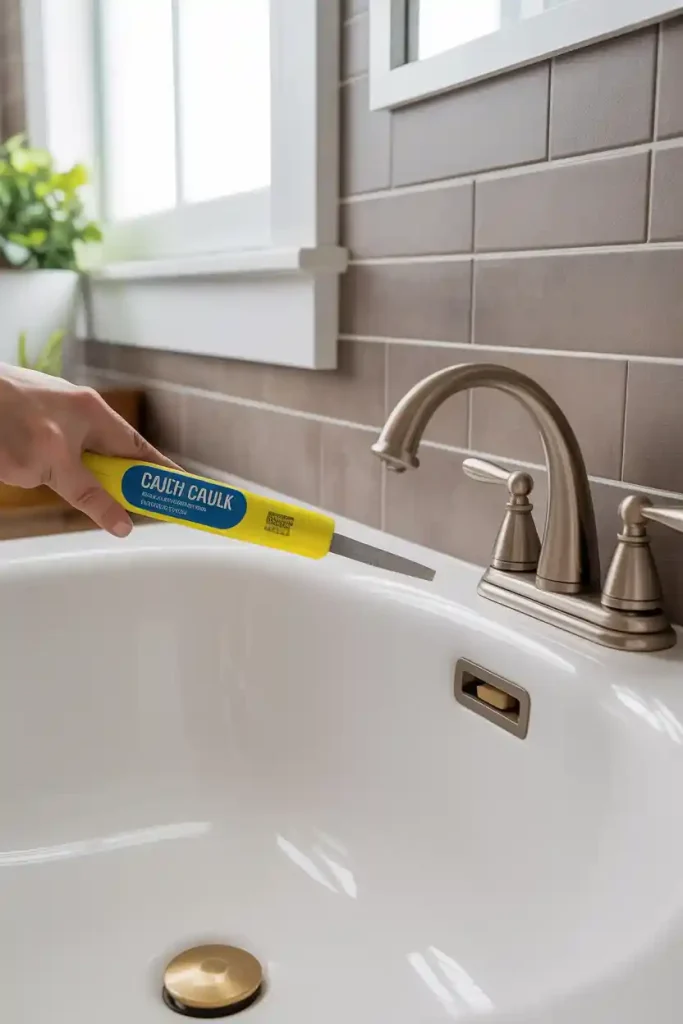
Over time, caulk around bathtubs, sinks, and windows can crack or discolor, leading to water leaks and mold growth. Replacing caulk is an easy project that gives a space a cleaner, fresher look.
- Steps: Remove the old caulk with a utility knife, clean the area, and apply a smooth bead of fresh caulk.
This small upgrade makes a big difference in maintaining a healthy, moisture-free home. Pair it with simple bathroom organization hacks to keep the space looking tidy.
9. Replacing Light Fixtures
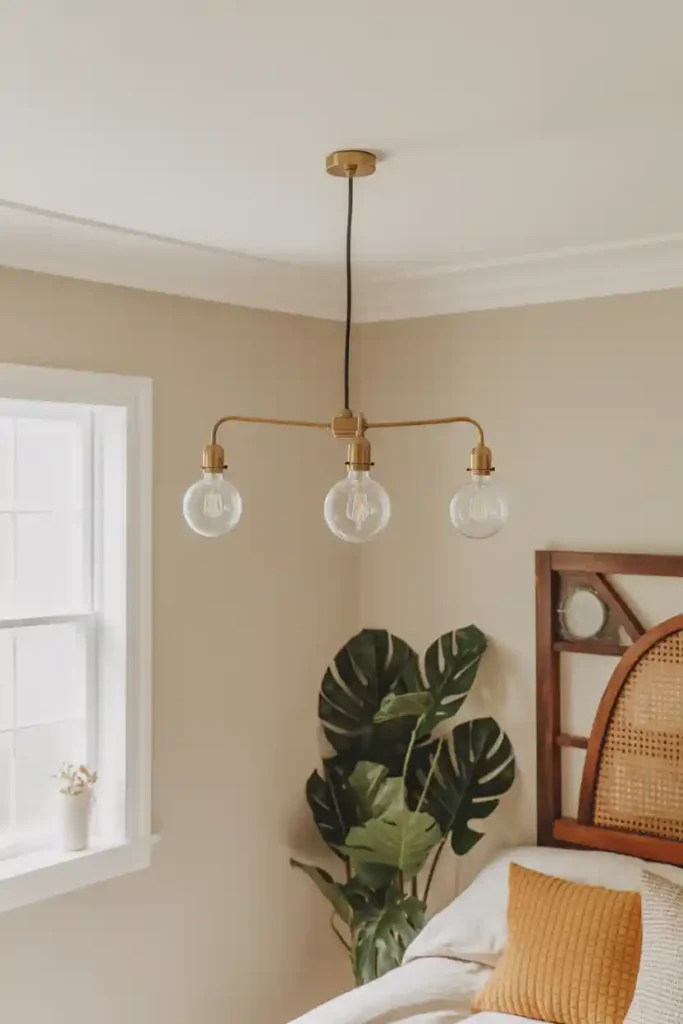
Swapping out an outdated light fixture is one of the most transformative DIY home repair projects you can try. It instantly updates a room’s style while improving lighting.
- What you need: Screwdriver, voltage tester, and new light fixture.
- Steps: Turn off the power at the breaker, remove the old fixture, connect the new wiring, and secure the replacement.
Not only does this project boost functionality, but it also elevates the overall design. For inspiration, explore these lighting ideas for every room.
Final Thoughts
DIY home repair doesn’t have to be intimidating. With the right guidance and tools, you can handle a wide range of projects—from fixing leaks to refreshing your décor—saving money and learning new skills along the way.
Start with small projects like unclogging drains or patching drywall holes, then work your way up to more confidence-boosting tasks like replacing tiles or updating fixtures. Over time, these simple repairs can significantly enhance the comfort, efficiency, and value of your home.
By tackling these 9 DIY home repair projects, you’ll not only maintain your living space but also gain a stronger sense of pride in your home.


